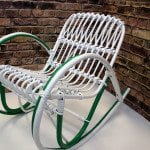
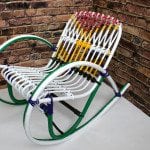
When you have old looking furniture you don't like anymore, please, don't throw it away to buy a new one instead. 1) your budget will thank you. 2) you can create a very personalized furniture that perfectly matches your taste!
I just happened to have a kid's cane chair that really needed a makeover. I went for a Toy Story theme: bright colors and easily identifiable children’s cartoon characters. First of all, I would advise everyone to plan a bit how you want your furniture to look like after the makeover to help you with your shopping list. Then… take a deep breath and let's go!
Toy Story Chair Makeover
Here, I'm going to share a step by step tutorial. Of course, it's about my Toy Story Chair, but you can adapt it to any type of furniture. Last but not least: I promise, the decoupage technique that looks so nice and personalized is very (very) easy.
Materials:
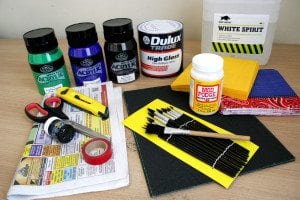
– a piece of furniture you want to customize
– paint (colors of your choice)
– white paint (enough to entirely cover the furniture 2 times)
– napkins with patterns you like + craft glue
– washi tape (optional) to create special patterns
– newspaper to protect the floor
– scissors, brushes (size depending on your furniture), sandpaper, utility knife, white spirit
STEP 1: Sanding
Clean your furniture to remove all dust (especially if you haven't used it for a while). Then sand it – I personally used grit 60 & 120. Once all varnish has been removed, clean the furniture one more time. Use a kitchen towel / tissues / brushes but make sure it is as smooth as possible
STEP 2: White coats
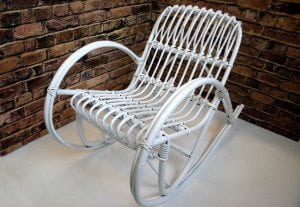
Apply a first coat of white paint all over your furniture. Once it's dry, apply a second coat. It takes a bit of time however the results are worth it.
STEP 3: Colors
It's now time to start painting for real. Remember to always start with the lightest color. Apply a first coat & allow time to dry. Then, apply a second coat. When it's dry, go for another (darker) color.
Here, I used green & purple paints on the armrests to represent Buzz Lightyear. That's all for Buzz, I started right after with Woody and his brown belt.
STEP 4: Decoupage
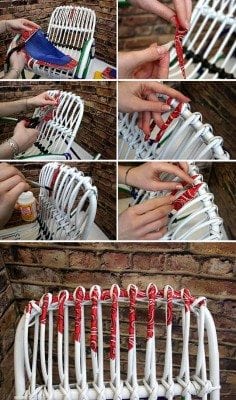
For those who are not familiar with this technique, don't worry, it's very easy and it looks great. Basically, you need to take a napkin with a pattern you like and stick it on your furniture with some craft glue (I used Mod Podge). First, cut out a napkin in a shape that matches your furniture and remove the white lining. With a brush, apply Mod Podge on a small area of the furniture and then stick the napkin. That is it! Repeat the process to cover the whole furniture or just part of it.
If you want a varnish finished look, apply a coat of Mod Modge all over the napkins. It also helps to protect it.
I used three styles of napkins; red bandana, yellow for the shirt and blue for the denim jean pattern. For my theme, I wanted a cow boy shirt but I was unable to find napkins with such pattern. Plan B: I used stripes of red washi tape! I cut out thin stripes with an utility knife and I stuck them over the yellow napkins. Voila. Easy, isn't it?
STEP 5: Details
When you're almost done, just give the finishing touches to your chair, using small brushes to be more precise.
I added a brown hat, and a cow waistcoat. Hi Woody!
Ok, that’s it. Only 5 steps to get a brand new looking piece of furniture, one you can treasure for a long time.
I hope you liked my Toy Story Chair: don't hesitate to have a look to the pictures tutorial I made and have fun while creating your own chair!
~~~~~~~
Guest Post by Alicia Thompson.
