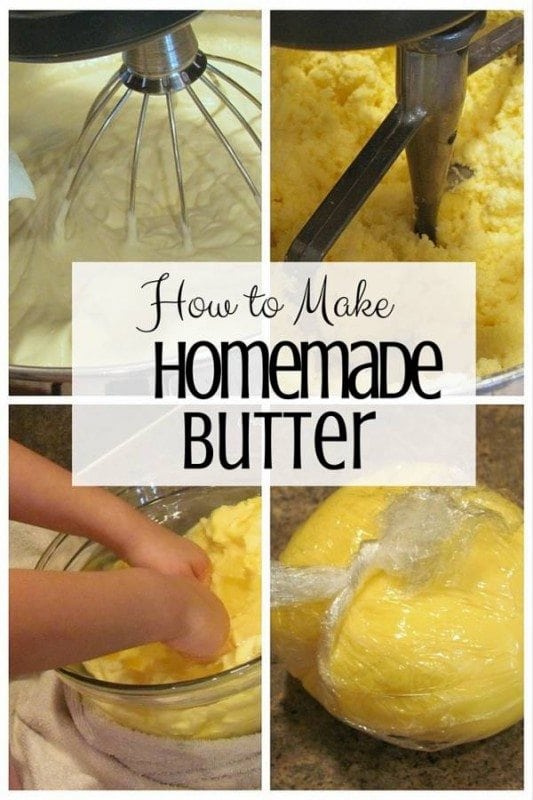
Back in the old days, butter was made by hand. Today, one can buy it from the store. If you want to create your own butter, but not using the traditional way, then this is for you.
Making homemade butter is one of those simple joys that makes you feel connected to old-school kitchen magic. I remember the first time I made butter—it started as a “let’s see if this works” moment, and now it’s one of my favorite little kitchen projects. Let’s get started!
What You’ll Need
- 2 cups of heavy cream (cold)
- A pinch of salt (optional, but I always add it for flavor)
- A stand mixer, hand mixer, or even just a mason jar with a lid
- Cheesecloth or a fine mesh strainer
- A bowl for catching buttermilk
Step 1: Whip the Cream
Start with cold heavy cream. Pour it into the bowl of your stand mixer (or a large mixing bowl if you’re using a hand mixer). If you’re going the mason jar route, just pour it into the jar and make sure the lid is on tight.
Turn the mixer to medium speed and let it go. First, the cream will thicken into whipped cream. Don’t stop there! Keep going, and soon it’ll turn grainy and start to separate. This is where the magic happens. You’ll see yellow butter solids form, and the leftover liquid is buttermilk.
Step 2: Strain the Buttermilk
Once the butter and buttermilk have separated, pour the mixture into a fine mesh strainer or cheesecloth-lined bowl. Let the buttermilk drain out. You can save the buttermilk for pancakes, biscuits, or even marinating chicken.
Tip: I always pour the buttermilk into a little mason jar and pop it in the fridge.
Step 3: Rinse the Butter
Now it’s time to rinse your butter. This step helps it last longer by removing the leftover buttermilk. Place the butter in a clean bowl and pour cold water over it. Use a spatula or your hands to gently knead the butter, squeezing out as much liquid as you can. Pour off the cloudy water and repeat this process with fresh water until it runs clear.
The first time I did this, I couldn’t stop squishing the butter in my hands—it felt oddly therapeutic!
Step 4: Add Salt (Optional)
If you want salted butter, now’s the time to add a pinch of salt. Sprinkle it over the butter and knead it in until it’s evenly distributed. Taste as you go so you get just the right amount of saltiness.
I always sneak a little taste at this stage. Fresh butter is so good it’s hard not to eat it straight from the bowl.
Step 5: Shape and Store
Form the butter into a ball or press it into a butter dish. You can also wrap it in wax paper for a more traditional look. Store it in the fridge for up to a week or in the freezer for longer.
Pro tip: I like to split the butter into two portions. One stays plain, and the other gets fancy with add-ins like honey or fresh herbs (honey butter on warm toast is pure bliss).
Making butter at home is easy, fun, and kind of addictive. The kids love shaking the mason jar version, and I love how simple ingredients can turn into something so delicious. Once you try it, you’ll want to make a batch every week. Go ahead—whip up some butter and impress everyone at the breakfast table!


