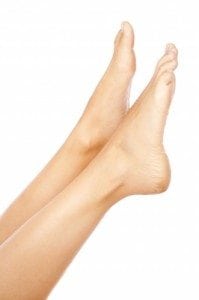
Forget costly salon pedicures, you can easily give yourself a professional pedicure at home. Regular foot care not only gives you fabulous looking feet; it’s good for the health of your feet. So, whether you are getting ready for summer, heading off on holidays or just want to get your feet looking polished and well-groomed as part of your weekly beauty regime – clear your busy schedule for an hour or so and give yourself a do-it-yourself pedicure. Go a step further and create a spa atmosphere with candles and music or just catch up on your TV shows. After all, this is “me-time”!
Here’s a step by step guide on how to do a pedicure at home:
- Gather Tools – Begin by assembling all the tools and equipment you’ll need. You’ll require nail clippers, a pumice stone or pedicure file, a nail file, orange wood sticks to push back your cuticles, a nail buffer, cotton make-up pads, cotton balls, non acetone nail polish remover and nail base coat, top coat, and your favorite colour polish.
- Soak – Soak your feet in a foot bath or a large flat bottomed bowl, filled with warm water for fifteen to twenty minutes. You may wish to add some Epsom salts and a few drops of your favorite essential oils to your foot bath or even a quarter cup of milk, as the lactic acid in the milk will help loosen dead skin cells. Use a nail brush to clean your feet and nails while they are soaking.
- Exfoliate – Exfoliate your feet while they are still damp using a pumice stone or pedicure file along with some type of exfoliating scrub. You can use a commercial product or make your own scrub by combining two parts oatmeal to one part water to produce a thick paste, or if you prefer, try three parts sugar to two parts oil. Once your feet feel smooth, rinse them off and dry them well.
- Trim and File – Use the nail clippers to trim your toenails, cutting them straight across, then smooth the edges of the nail with a nail file. To prevent splitting and breaking, always file your nails in one direction. Use an orange wood stick to gently push back your cuticles. You can apply a little cuticle cream or olive oil to help ease the skin back.
- Moisturize – Moisturize your feet with your favorite moisturizer, body lotion, cream or oil, massaging it into your skin, nails and between your toes using gentle circular motions. Continue to massage until it’s completely absorbed. You can also aid absorption by slipping on a pair of cotton socks, or wrapping you feet in plastic bags and relaxing for fifteen minutes.
- Polish – Now you are ready to polish your toes. Use nail polish remover to wipe away any excess oils on your nails. Separate your toes using cotton balls to keep them from rubbing together. Start by applying a thin base coat, which will help your nail polish last longer. Once the base coat is completely dry, apply two coats of nail polish, allowing it to dry thoroughly in between coats. You can then set the polish by applying a final top coat. When applying polish, use the three stroke method; one stroke down the middle then a stroke on each side of the nail. And remember that nail polish, regardless of the brand you are using, takes about twenty minutes to dry.
- Clean Your Tools – After your do-it-yourself pedicure, clean your equipment with soap and water and sterilize them by rinsing them in rubbing alcohol. Keeping your equipment clean will help avoid the risk of infection.
Save the money you might have spent on professional pedicures, and buy yourself something special. It’s also fun to invite your friends over and give each other a perfect pedicure and a foot massage.
~~~~~~~
written by: Muzammil Bashir
~~~~~~~


