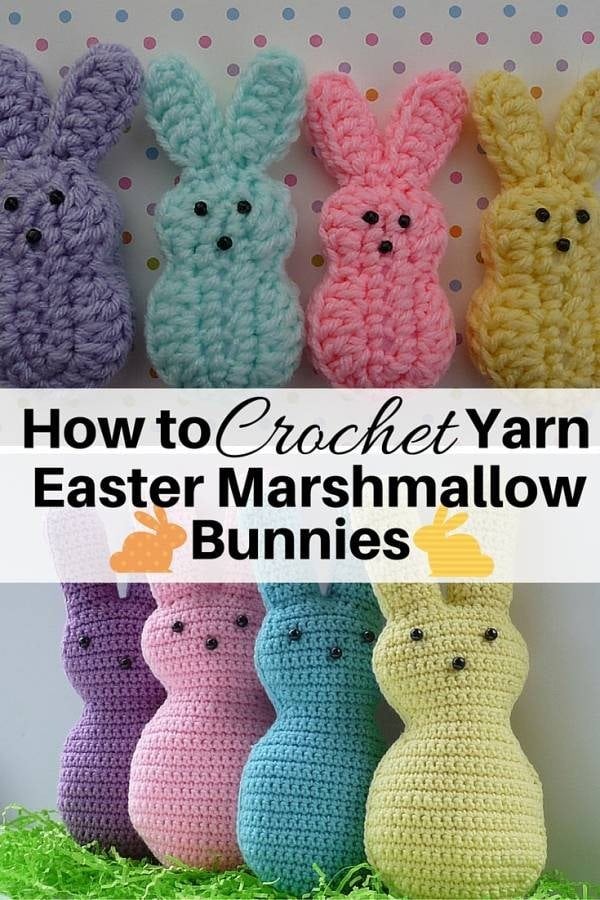
Last Easter, I wanted to add a handmade touch to our celebration, so I decided to crochet these tiny pastel bunnies. They’re only 3 inches tall, but they were a huge hit with everyone. My kids even named them: Sunny (yellow), Rosie (pink), Skye (blue), and Violet (purple). Let me show you how to make them!
Materials You’ll Need
- Pastel-colored yarn: I used soft yellow, pink, blue, and purple for a true Easter vibe.
- Size 2.5mm crochet hook: Perfect for small projects like these.
- Black embroidery thread: Just a tiny bit for the face.
- Fiberfill stuffing: Don’t overstuff; they’re small and don’t need much.
- Yarn needle and scissors.
Body and Head
- Start with the body: Begin with a magic ring and crochet 6 single crochets (sc) into the ring. Pull it tight to close. I used yellow for my first bunny, and it instantly reminded me of sunshine.
- Increase round: Crochet 2 sc into each stitch around (12 stitches).
- More increases: Work 1 sc, 2 sc in the next stitch—repeat around (18 stitches). This gives the bunny its chubby little body.
- Build the body height: Sc in each stitch for 5 rounds. Here’s where I like to hum a little tune—it makes repetitive stitches more enjoyable.
- Decrease round: Work 1 sc, sc 2 together—repeat around (12 stitches). Start stuffing lightly as you go.
- Shape the head: Work 2 sc, 2 sc in the next stitch—repeat around (18 stitches).
- Create the face: Sc in each stitch for 4 rounds. I paused here to imagine where the eyes and nose would go, giving it personality even before finishing.
- Close the head: Work 1 sc, sc 2 together—repeat around (12 stitches), then sc 2 together—repeat around (6 stitches). Stuff firmly and sew the opening shut.
Ears
- Chain 6.
- Starting in the second chain from the hook, crochet 4 sc, then make 3 sc in the last chain.
- Work down the other side of the chain with 4 sc.
- Slip stitch to finish and leave a tail for sewing.
When attaching the ears, I like to tilt them slightly outward for a playful look.
Arms and Legs (Optional)
- For arms: Chain 5, slip stitch into the second chain from the hook, and in each chain back. Leave a tail for sewing. Make 2.
- For legs: Chain 6, slip stitch into the second chain from the hook, and in each chain back. Leave a tail for sewing. Make 2.
I added legs to only one bunny (Rosie) and arms to another (Skye). It’s fun to mix things up so they all feel unique.
Tail
I used leftover yarn to make tiny pom-poms. If you’ve never made one, just wrap yarn around two fingers, tie it in the middle, and snip the loops. My kids kept sneaking off with these, so I had to make extras!
Face
- Use black embroidery thread to stitch two small eyes and a nose in a triangle shape.
- For Violet, I added tiny whiskers. My daughter said it made her look “fancy.”
Tip: Use a fine needle for embroidery so the face details are neat and precise. If you mess up, no worries—it’s easy to redo.
Finishing Touches
- I tied little bows around their necks using thin pastel ribbons.
- For Rosie, I made a tiny flower out of scrap yarn and stitched it on one ear. My daughter called her the “fashion queen” of the bunnies.
We scattered these bunnies all over the house for Easter—on the dining table, in the kids’ baskets, and even in the planters. One ended up in my purse because my toddler insisted I “keep it safe.” They’re so quick to make, you might end up with a whole family of bunnies before you know it.
Have fun crocheting! 🐰💛💜💙💖


