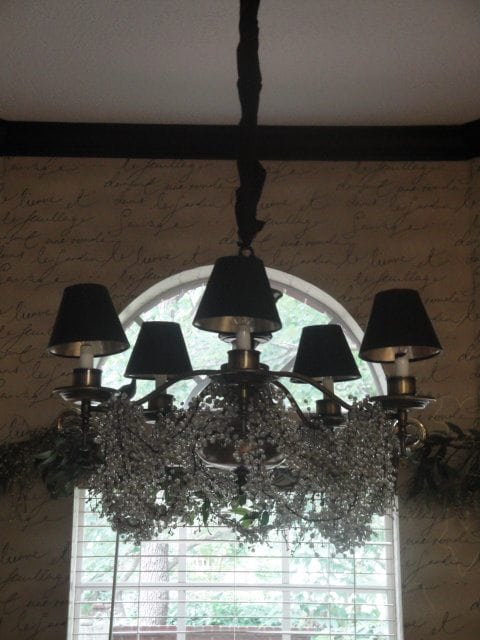
Home Makeover – Chandelier
Most of us have a chandelier or light fixture that is desperately dated & needs replacing OR does it just need a makeover?
When we bought our house 8 years ago, the kitchen chandelier was on my “needs to go” list.
Unfortunately, I couldn't afford to replace everything on my list, so I decided to get creative with my kitchen chandelier.
Sorry that I cannot offer you a “before” picture, so you'll just have to visualize as I explain the makeover process!
-
- Replace the glass hurricane covers with black shades. I was lucky to find these at Stein Mart for $3 each! Lowes does keep all colors of small shades in stock.
Wind a scrap of fabric through the ugly chain that's hanging from the ceiling…less than a dollar!
Search your house for something “fun” to drape from the chandelier! I found these glass beads in my Christmas collection, & they work great year round!

Thankfully, my chandelier did not need to be painted, but yours just might be begging for a new color!
The Budget Diet girl says, PAINT IT! It's as easy as 1-2-3!
-
- Lightly sand.
-
- Spray paint or if it's too difficult to take your fixture down, use a foam brush & small bottle of acrylic paint from Michaels or Hobby Lobby.
- Glaze (optional). A glaze may be just what you need to get the color you desire. If you're not sure what to choose…I suggest going to a paint store for advice.
Yes…your shiny brass chandelier can have the look of wrought iron with a quick coat of black paint!


