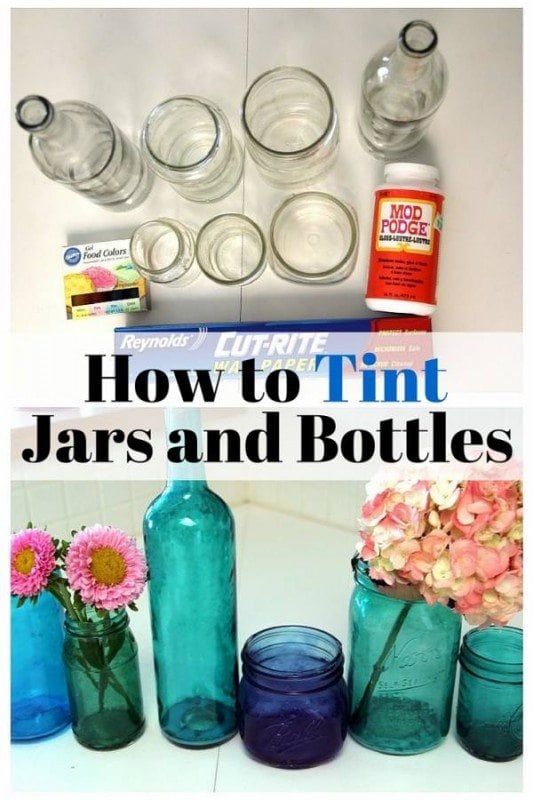
Are you ready for another beautiful D.I.Y. craft? Try this astonishing D.I.Y. tinted bottles and jars. Turn those old and unused bottles and jars into attractive home decor pieces. With just plain bottles and jars, you can make lovely tinted containers that look breathtaking beside a window, a pretty candle holder or a pleasing flower vase. Here is my full tutorial so that you can make some yourselves!
Note: There's a ton of cool stuff that can be done with Mason Jars and this is just one example. We would suggest checking out MasonJars for more ideas. They always are updating their stock of DIY projects, recipes, and mason jar accessories.
Want to earn free gift cards to major brands? Checkout:
- Scrambly: Earn cash by playing fun mobile games and downloading apps!
- Branded Surveys: Share your opinion to earn gift cards and PayPal money!
Step One: Gather Your Supplies
For this project, you will need Mod Podge Gloss Luster Finish, food coloring, disposable craft containers (for mixing), stir sticks, a baking sheet, wax paper, and a collection of clear recycled glass bottles.
Step Two: Preparation

It is important that the recycled bottles that you find get cleaned up really nicely. Start by soaking them in warm, soapy water, until any paper labels start to slough off. Scrub, rinse, and dry the bottles. Next, prep your Mod Podge mixture. To do this, you will pour Mod Podge into separate containers. I recommend starting out with three containers for three separate mixtures, at least.
Next, add food coloring into the containers, and stir each mixture individually. This will be your color tint, and the more food coloring you add, the darker the tint will be. My mixtures were green, blue, and purple (a mix of blue and red coloring). For a lighter tint, stir in some water and mix thoroughly. You can make any color combinations you like!
Step Three: Coat and Let Sit

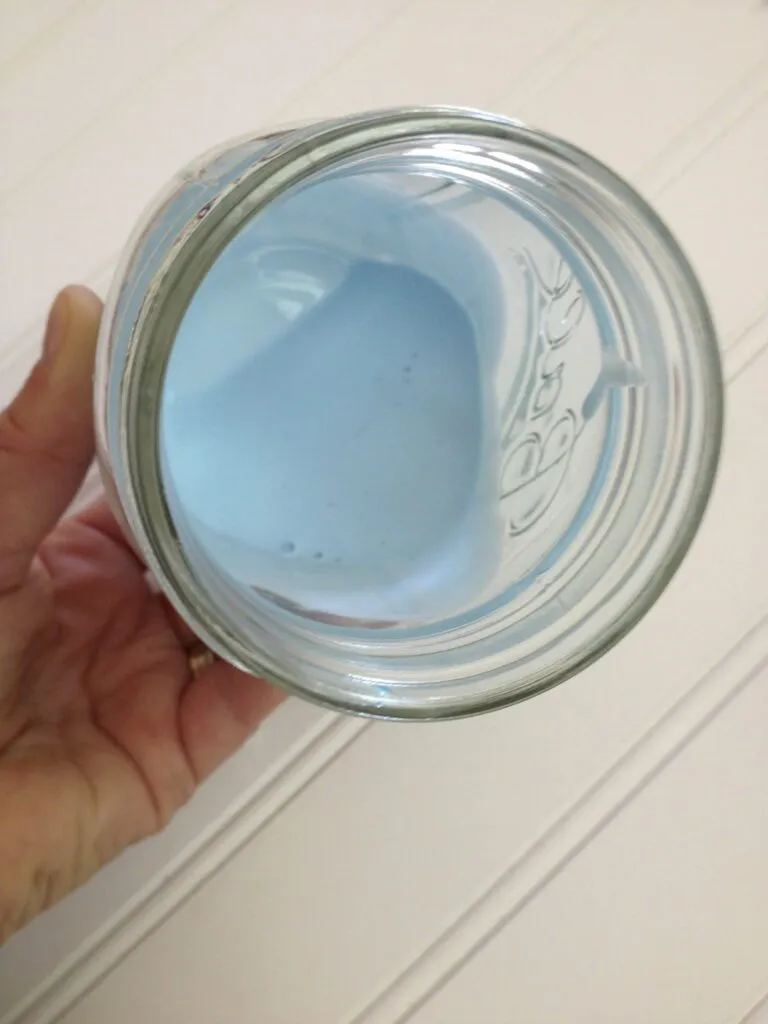
The next step is to pour a nice dollop (about two tablespoons if you are working with a 12 oz jar) into the bottom of your clean and dry jar. Swirl the jar on it's side until the colored Mod-Podge is coating all of the inner surface. Place each jar, as you finish it, upside down over a piece of newspaper or paper towel. Let this sit for about one hour.
Step Four: Baking Your Jars
Preheat the oven to 225 degrees Fahrenheit. Cover a baking sheet with wax paper, and place your jars on it. Once the oven is heated, place the jars inside, being careful that none fall or tip over in the process. You might have to remove shelving from your oven in order to make room for the height of your jars.
If your jars are all around 12 to 24 ounces, about 45 minutes will work. If they are larger, they may need some more time. Look for even, clear texture and coloring. Turn the oven off, and let your jars sit inside the oven and cool slowly.
Then put them to use! These look so pretty set on a window sill, or holding bright and colorful flowers. Crafting is such a fun hobby, especially for those of us who are frugal and love to re-use and recycle. I hope that you enjoy this project!


